
Image upload with Cloudinary - Part 2 (Next/React & Node JS)
Learn how to upload an image to Cloudinary service

Welcome in the second part of "how to upload an image" guide. We will start with some useful links.
Part 1: https://www.eincode.com/blogs/image-upload-with-cloudinary-part-1
Video guide: https://youtu.be/285ok1WNI0s
Lesson code: https://github.com/Jerga99/next-youtube-course/commit/3ce18ff1383f165e4be7b080f20a175328a0cdc8
Let's start straight away with some coding. Last part we finished by sending of the POST request with an attached image as part of Form Data.
Now we need to do get the image from request and procces it. For this we will use Multer package.
const multer = require('multer');

const ALLOWED_FORMATS = ['image/jpeg', 'image/png', 'image/jpg'];

const storage = multer.memoryStorage();
const upload = multer({
  storage,
  fileFilter: function(req, file, cb) {
    if (ALLOWED_FORMATS.includes(file.mimetype)) {
      cb(null, true);
    } else {
      cb(new Error('Not supported file type!'), false);
    }
  }
})

const singleUpload = upload.single('image');
const singleUploadCtrl = (req, res, next) => {
  singleUpload(req, res, (error) => {
    if (error) {
      return res.status(422).send({message: 'Image upload fail!'});
    }

    next();
  })
}index
Before writing the code install Multer package -> npm install --save multer
Initialize Multer by creating upload object. Specify type of memory storage. Images will be stored in memory only for period of time while serving the request. Then provide fileFilter which will be executed every time, request with the image is handled. In filteFilter we are checking if an image contains correct file format.
Then we need to create middleware function. Let's call it singleUploadCtrl. In the middleware execute singleUpload function which we got from the upload object.
Execute singleUpload function and provide to it 3 values, req, res and callback function which will be executed after request is checked. If form data are correctly provided and image is valid then callback function will be executed without the error, image will be processed and provided on req.file object and next() function will be called which will execute next request handler.
This one:
app.post('/api/image-upload', singleUploadCtrl, (req, res) => {
  try {
    if (!req.file) { throw new Error('Image is not presented!'); }
    console.log(req.file);

    return res.json({message: 'Huraaaay'});
  } catch(e) {
    return res.status(422).send({message: e.message})
  }
})index
Now restart your Node server and send a request to upload the image. It's not failing anymore. Image is successfully provided on req.file and it looks like this:
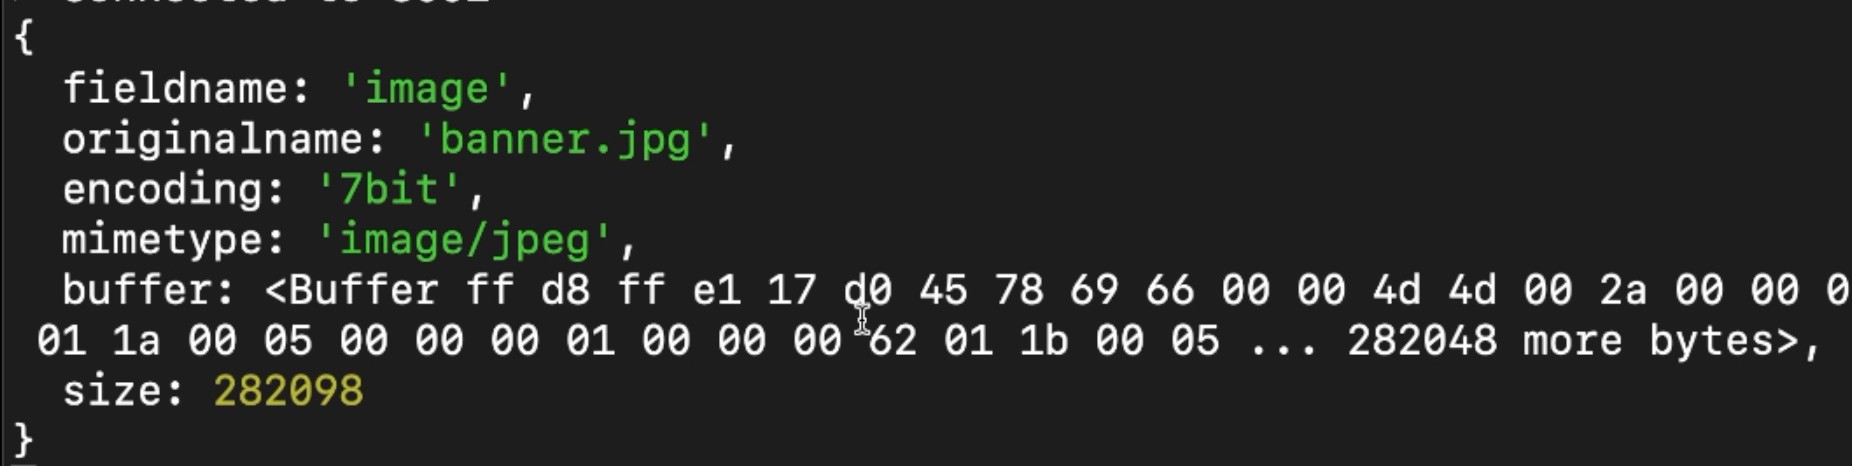
Important part here is to notice the buffer. It's a sequence of bytes. That's the problem. We need to upload the image as base64 string, so now we need to prepare functionality to transform it.
Install dataUri -> npm install --save datauri
Let's implement this:
const path = require('path');
const DatauriParser = require('datauri/parser');
const parser = new DatauriParser();

const formatBufferTo64 = file =>
  parser.format(path.extname(file.originalname).toString(), file.buffer)


app.post('/api/image-upload', singleUploadCtrl, (req, res) => {
  try {
    if (!req.file) { throw new Error('Image is not presented!'); }
    const file64 = formatBufferTo64(req.file);

    return res.json({message: 'Hurraaay'});
  } catch(e) {
    return res.status(422).send({message: e.message})
  }
})index
We have just created function formatBufferTo64 which will takes a buffer and transforms it into base64 format. Amazing!
Now we are ready to upload the image to Cloudinary. First register on Cloudinary -> https://cloudinary.com/ . It's free!
After you are registered you need to prepare your cloud. Just follow steps that popped up after you are registered.
You should end up with these data:
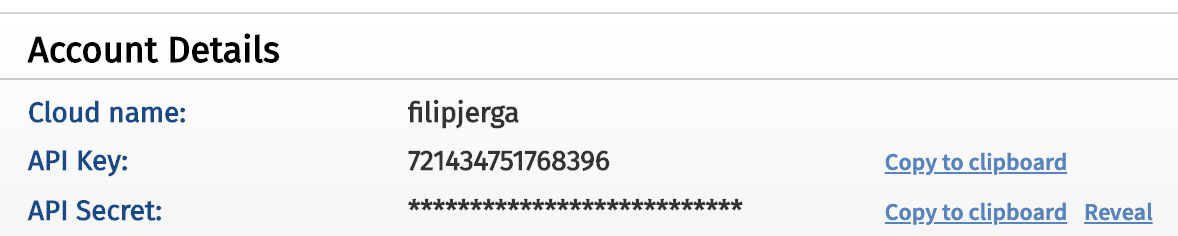
Never ever share API Secret and the key!!!
Once we have these data we can proceed with the implementation. First install cloudinary -> npm install --save cloudinary
Then:
const cloudinary = require('cloudinary').v2;

cloudinary.config({
  cloud_name: "Your cloud name",
  api_key: "your api key",
  api_secret: "your secret keu"
})

const cloudinaryUpload = file => cloudinary.uploader.upload(file);

app.post('/api/image-upload', singleUploadCtrl, async (req, res) => {
  try {
    if (!req.file) { throw new Error('Image is not presented!'); }
    const file64 = formatBufferTo64(req.file);
    const uploadResult = await cloudinaryUpload(file64.content);

    return res.json({cloudinaryId: uploadResult.public_id, url: uploadResult.secure_url});
  } catch(e) {
    return res.status(422).send({message: e.message})
  }
})index
Please store your Cloudinary credentials to safe spot and don't expose it. You can create .env file as explained in the lecture video.
Now we are able to upload the images to Cloudinary! CloudinaryUpload function expects to receive base64 image string. Then you just need to call upload function with the file. Result of this function is uploaded image containing ID and URL of the image. Now we can send these informations as JSON response back to the clients!
Let's move back to frontend.
const Upload = () => {
  const [selectedImage, setSelectedImage] = useState();
  const [images, setImages] = useState([]);
  // ... rest of the code


  const handleImageUpload = () => {
    if (!selectedImage) { return; }
    const formData = new FormData();
    formData.append('image', selectedImage);

    uploadImage(formData)
      .then(uploadedImage => {
        setImages([...images, uploadedImage])
      })
    // ... rest of the code

  const displayImages = () =>
    images.map(image =>
      <div key={image.cloudinaryId} className="col-md-3">
        <a
          className="d-block mb-4 h-100"
          target="_blank"
          href={image.url} >
          <img className="img-fluid img-thumbnail" src={image.url}/>
        </a>
      </div>
    )

    // ... rest of the code

    return (
    <>
      <PageTitle text="Upload Image"/>
      // rest of the code ...
      <div className="row text-center text-lg-left">
        { images ? displayImages() : 'There are no images :('}
      </div>
    </>
  )
}

export default Upload;upload
We have done just couple of changes. We have created empty array state of images. Once the image is uploaded we are pushing it into the rentals state.
After image is pushed into the state we can display it. For this we have created displayImages function which will simple iterate the images and display them nicely.
Guys that should be it. Your image should be now succesfuly uploaded to Cloudinary. In case of any problems please compare my github repository with your code.
For more courses and blogs see: https://academy.eincode.com
Part 3: https://www.eincode.com/blogs/image-upload-with-cloudinary-part-3
Cheers.
Filip
Filip Jerga
Senior developer and educator passionate about making programming accessible to everyone through practical, hands-on learning experiences. Creator of 100+ courses with over 100,000 students worldwide.
Enjoyed this article?
Subscribe to our newsletter to get the latest programming tutorials and insights delivered directly to your inbox