
Update Heroku domain name
Today I will walk you through change of domain name on Heroku.

Usually when you deploy your application you will have name something like this “https://shielded-ravine-97196.herokuapp.com".
Alternatively you can change this for custom name when you click in Heroku on your app and in settings you can type custom name. This will change a name but domain name of Heroku will stay. If you are still not happy and want to get rid of domain name completely then you need to buy domain name and point it to your app on Heroku. Lets assume you want to have “www.your-site.com".
I will explain you how to do it with domain provider GoDaddy.
- Create account on GoDaddy
- Find and buy domain domain search
- Go back to Heroku click on your app and in settings click add domain, enter domain name you bought before.
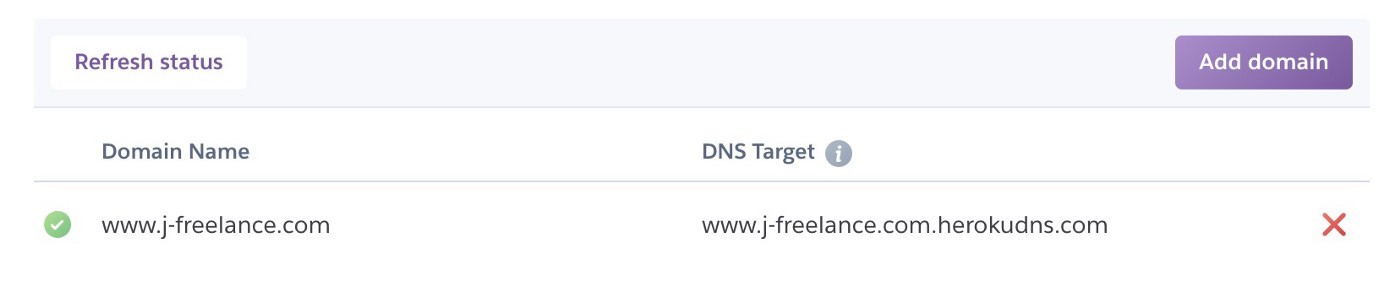
Heroku dns settings
Notice Heroku DNS Target(domain name system) This is important we need copy this url and copy it to our domain provider in our case GoDaddy.
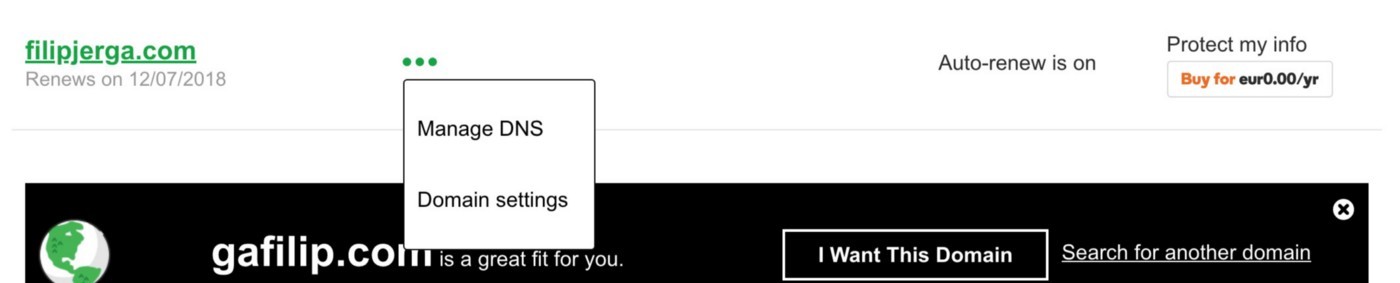
4. Go back to GoDaddy, click on your profile -> manage domains
5. Select your domain and click DNS settings
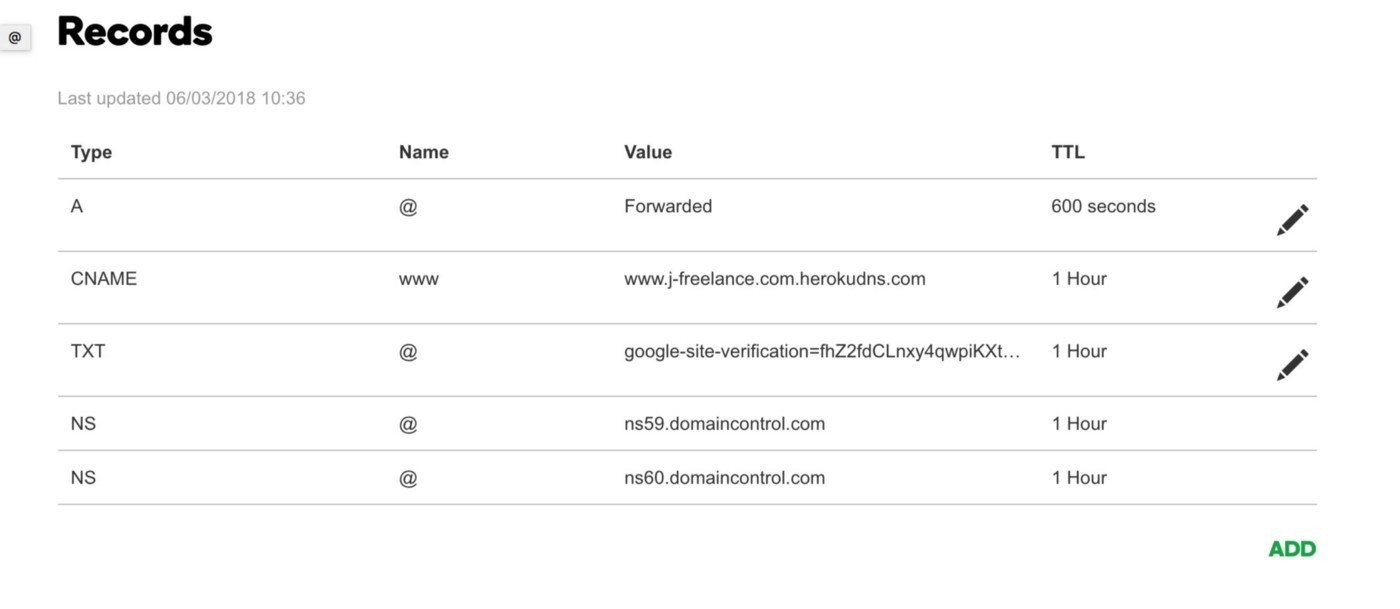
6 . You should see records table , you can delete all current CNAME entries. Then add CNAME similar to mine but as value enter your Heroku DNS, not mistake for Heroku url!
7. That should be it now you can navigate to “www.your-site.com" and will see your Heroku app, changes take effect usually take some time so do not panic if nothing happens. Just make sure you copied everything on right place.
Additional Steps:
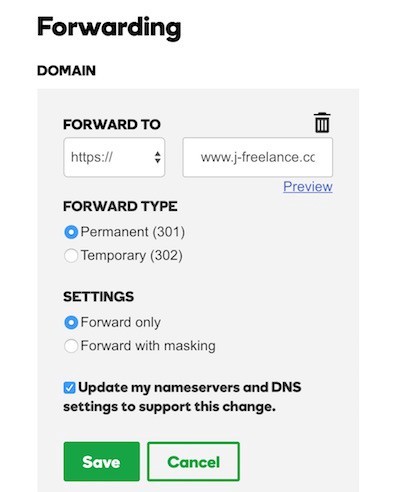
You can notice that you need to enter your website with “www” subdomain like “ www.your-site.com” in order to be presented with your Heroku app, When you do not enter subdomain “your-site.com” nothing happens. We need to setup CNAME for root address as we did with subdomain but this is not possible from manage panel on GoDaddy. So we need to do something else. Ideal solution would be change domain provider but I will go with forward solution. We can forward to subdomain when entering root address.
- Go to GoDaddy to same screen as we changed our CNAME for subdomain
- Scroll down and go to forwarding, click settings and fill in data similar to mine but with your domain, do not forget for “www” subdomain. Now everything should be correctly set. Wait few minutes and test your new domain name.
In case something is not clear or you need more explanation do not hesitate and write your problem in comment section. Aditionaly you can write me or check more blogs on https://eincode.com
Thanks for reading.
Filip
Filip Jerga
Senior developer and educator passionate about making programming accessible to everyone through practical, hands-on learning experiences. Creator of 100+ courses with over 100,000 students worldwide.
Enjoyed this article?
Subscribe to our newsletter to get the latest programming tutorials and insights delivered directly to your inbox